Motherboard Capacitor Repair Techniques: A Step-by-Step Guide
When your computer's motherboard experiences frequent crashes, random restarts, or erratic behavior, it may indicate a capacitor issue. In this article, we will delve into the world of capacitors, exploring the signs of a faulty capacitor, the tools and materials needed for repair, and a step-by-step guide on how to fix a capacitor on a motherboard.
Understanding Motherboard Capacitors
Motherboard capacitors are crucial components that filter and regulate the power supply to various components. When a capacitor fails, it can cause a range of problems, from system instability to complete failure. In this article, we will discuss the common signs of a faulty capacitor, the tools and materials needed for repair, and a step-by-step guide on how to fix a capacitor on a motherboard.
Signs of a Faulty Capacitor
The telltale signs of a failing motherboard capacitor include:
- Bulging or Leaking: Inspect capacitors visually for any abnormal swelling or electrolyte leakage.
- Unstable Power Supply: If your computer's power supply is unstable, it may indicate a capacitor issue.
- Frequent Crashes or Random Restarts: If your computer crashes frequently or restarts randomly, it may be a sign of a capacitor problem.
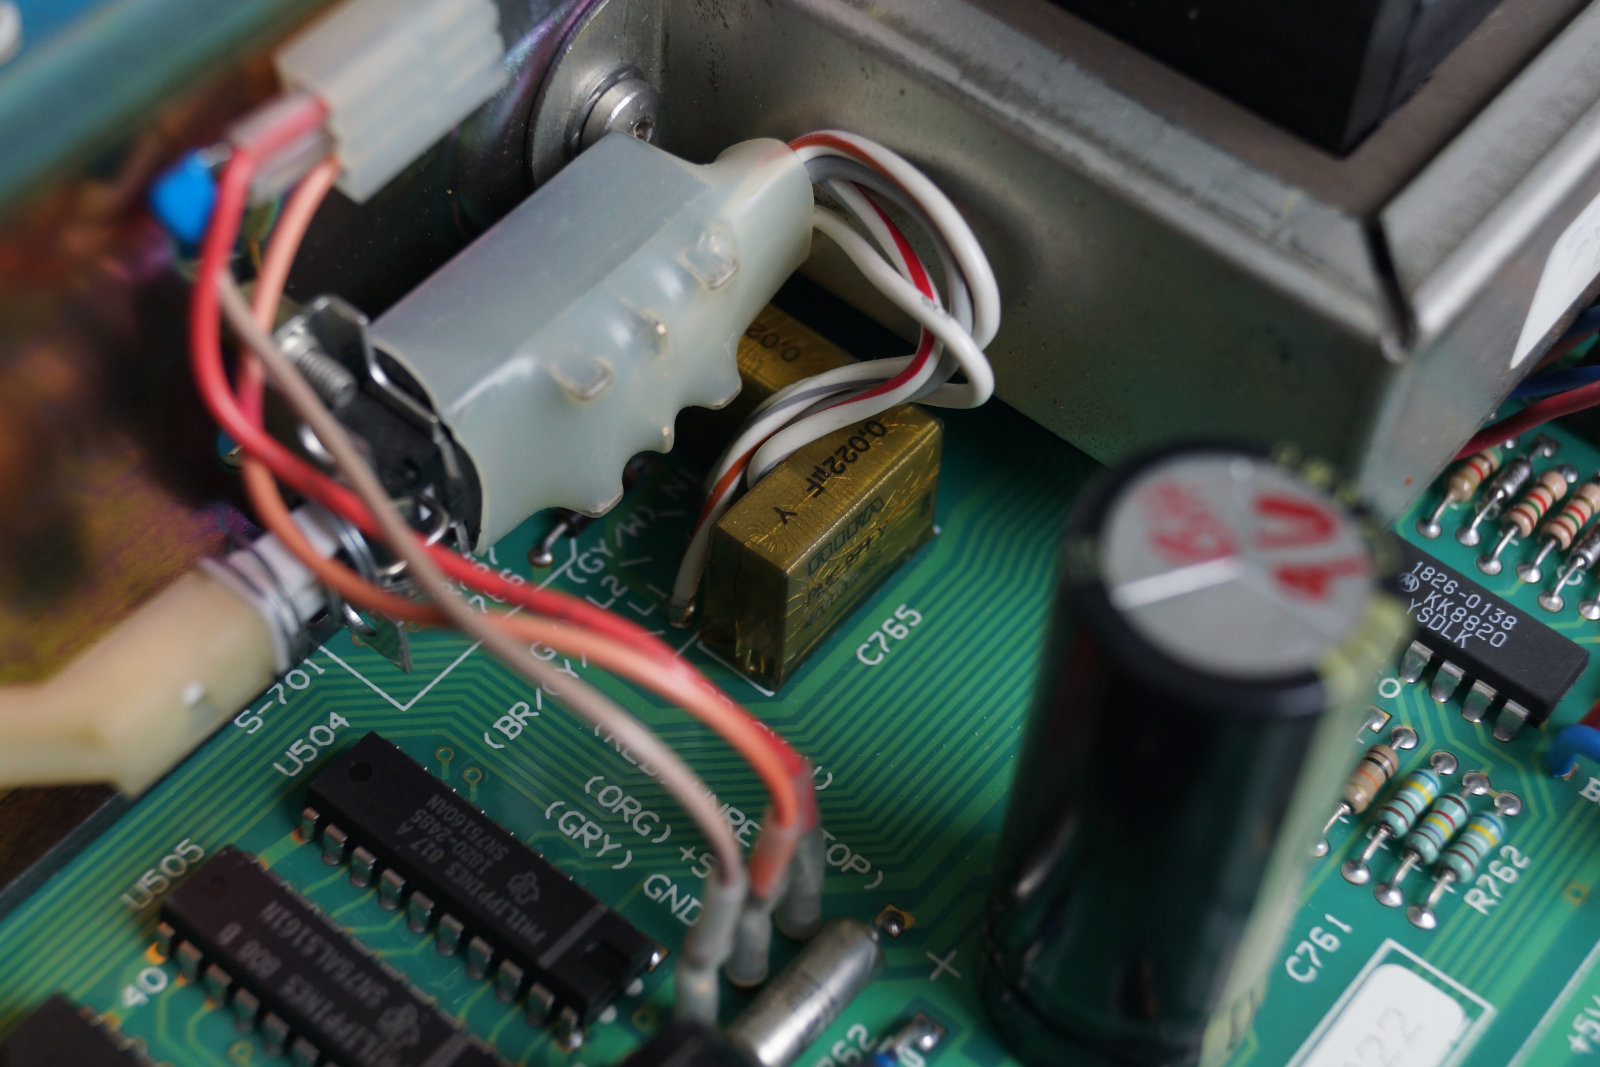
This particular example perfectly highlights why Motherboard Capacitor Repair Techniques is so captivating.
Tools and Materials Needed for Repair
To fix a capacitor on a motherboard, you will typically need:
- Soldering Iron and Solder Wick
- Desoldering Pump or Solder Wick
- Solder Wire and Flux
- Replacement Capacitors
Step-by-Step Guide to Fixing a Capacitor on a Motherboard
- Disconnect Power: Before starting the repair, disconnect the power cord from the motherboard.
- Locate the Faulty Capacitor: Identify the faulty capacitor and mark it for removal.
- Remove the Faulty Capacitor: Use a soldering iron to remove the faulty capacitor from the motherboard.
- Desolder the Solder Joints: Use a desoldering pump or solder wick to remove the solder from the joints.
- Install the New Capacitor: Install the new capacitor and solder the joints.
- Test the Motherboard: Once the repair is complete, test the motherboard to ensure it is functioning properly.
Proper soldering techniques are crucial when repairing a capacitor on a motherboard. Improper soldering can cause additional damage to the motherboard, making it difficult or impossible to repair.
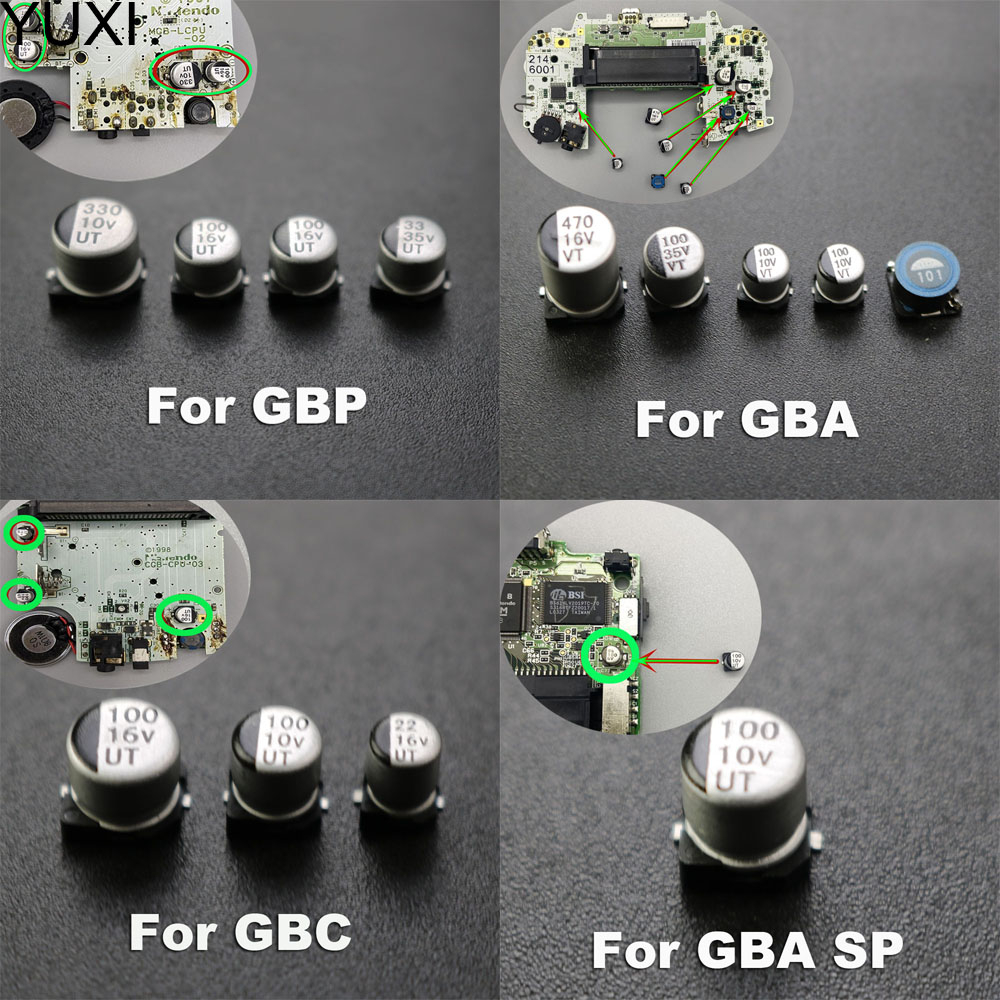
Furthermore, visual representations like the one above help us fully grasp the concept of Motherboard Capacitor Repair Techniques.
Some common motherboard capacitor repair techniques include:
- Capacitor Replacement: Replacing a faulty capacitor with a new one.
- Capacitor Soldering: Soldering a new capacitor to the motherboard.
- Capacitor Desoldering: Removing a faulty capacitor from the motherboard using a desoldering pump or solder wick.
Conclusion
Repairing a capacitor on a motherboard can be a delicate process that requires attention to detail and a good understanding of electronics. By following the steps outlined in this article, you can fix a capacitor on a motherboard and extend its lifespan. Remember to use proper soldering techniques and follow safety guidelines to avoid any damage to the motherboard or personal injury.
Motherboard Capacitor Repair Techniques: FAQs
Here are some frequently asked questions about motherboard capacitor repair techniques:

As we can see from the illustration, Motherboard Capacitor Repair Techniques has many fascinating aspects to explore.
Q: Can I replace a motherboard capacitor myself?
A: Yes, you can replace a motherboard capacitor yourself, provided you have the right tools and a steady hand.
Q: What are the signs of a faulty capacitor?
A: The signs of a faulty capacitor include bulging or leaking, unstable power supply, and frequent crashes or random restarts.
Q: What tools do I need to fix a capacitor on a motherboard?
A: You will typically need a soldering iron, desoldering pump or solder wick, solder wire and flux, and replacement capacitors.
Q: How do I replace a capacitor on a motherboard?
A: To replace a capacitor on a motherboard, follow the steps outlined in this article, including disconnecting power, locating the faulty capacitor, removing the faulty capacitor, desoldering the solder joints, installing the new capacitor, and testing the motherboard.


